To share a picture, video or a document in Office Chat, follow the instructions below:
Office Chat for Web
Click on the plus (+) sign in the chat window next to the message typing area and select “Attach Files”. You can also drag-drop the files to the chat window.
Office Chat for Windows
Click on the plus (+) sign in the chat window next to the message typing area and select “Attach Files”. You can also drag-drop the files to the chat window. Multiple attachments can be sent at a time.
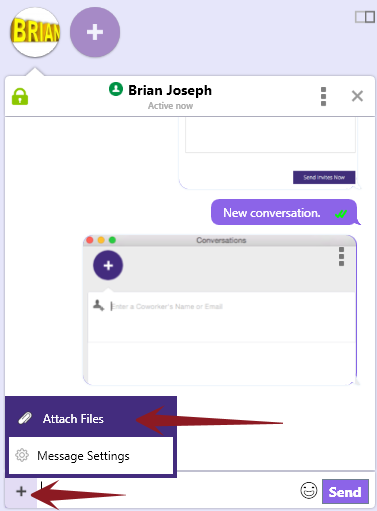
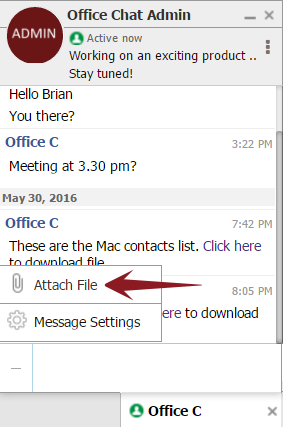
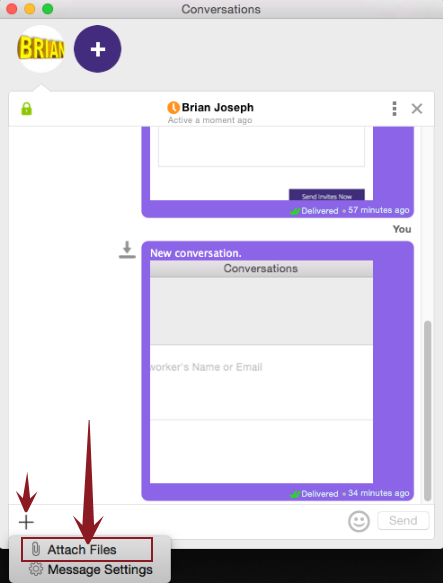
Office Chat for Mac
Click on the plus (+) sign in the chat window next to the message typing area and select “Attach Files”. You can also drag-drop the files to the chat window. Multiple attachments can be sent at a time.
Office Chat for Android
Click on the attachment icon to open the attachment panel. Select the attachment type, add attachments and send them. At a time, maximum 10 attachments can be sent.
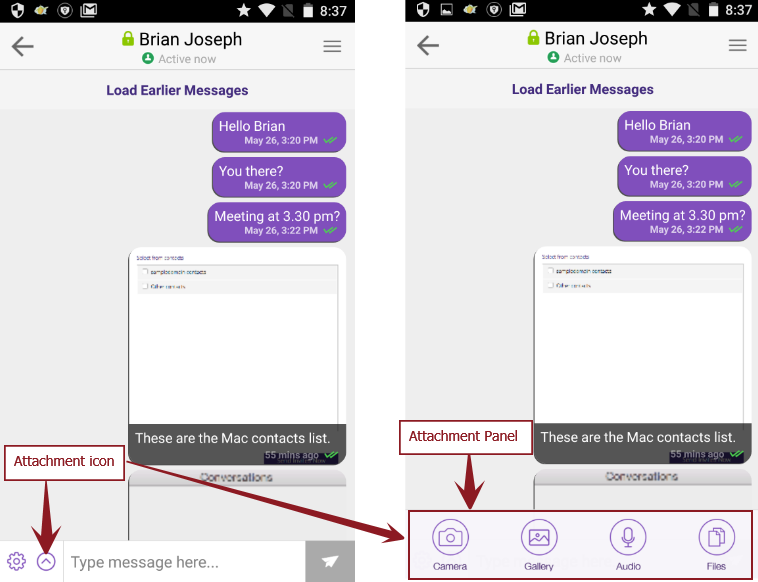
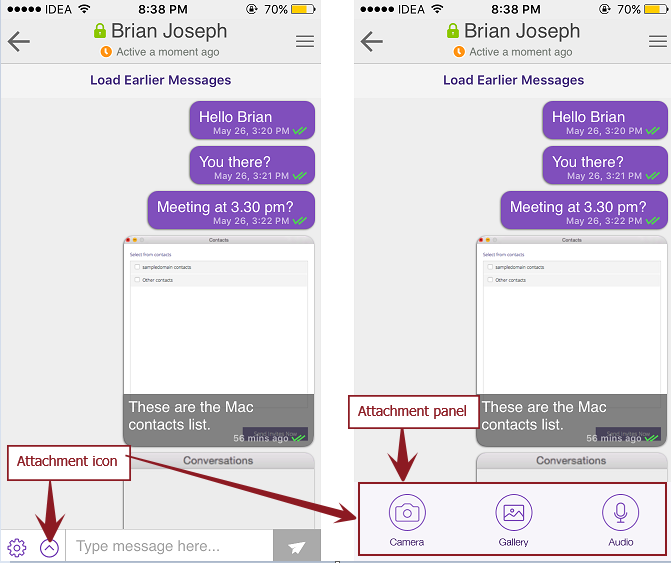
Office Chat for iOS
Click on the attachment icon to open the attachment panel. Select the attachment type, add attachments and send them. At a time, maximum 10 attachments can be sent.