How Do I Enable Google Apps for SSO in Office Chat?

Google Apps authentication (OAuth 2.0) allows users to sign in to Office Chat using their Google Apps accounts. This feature can be enabled by Network Administrators.

How to use Custom OAuth App for Google see this article.

To enable the Google Apps authentication from the Admin Portal:

1) Navigate to Admin Portal and then select “Integration” in the left navigation.

2) Here, select ‘Single Sign-On’ and then the Tab ‘OAuth 2.0’

3) You will then have to enable the option: ‘Enable Google Apps (Login using Google Account)’ and click ‘Save’

Kindly note when enabled, your users will be able to login using their Google account inside Office Chat.

TinyTake11-06-2019-11-52-50_636958309747478724_636958310924431868.png

How do I change Office Chat preferences?

To change the Office Chat preference from your Windows desktop app:

  1. Click on the “Profile” icon right next to the Name and the Status on the top left-hand side of the app window.
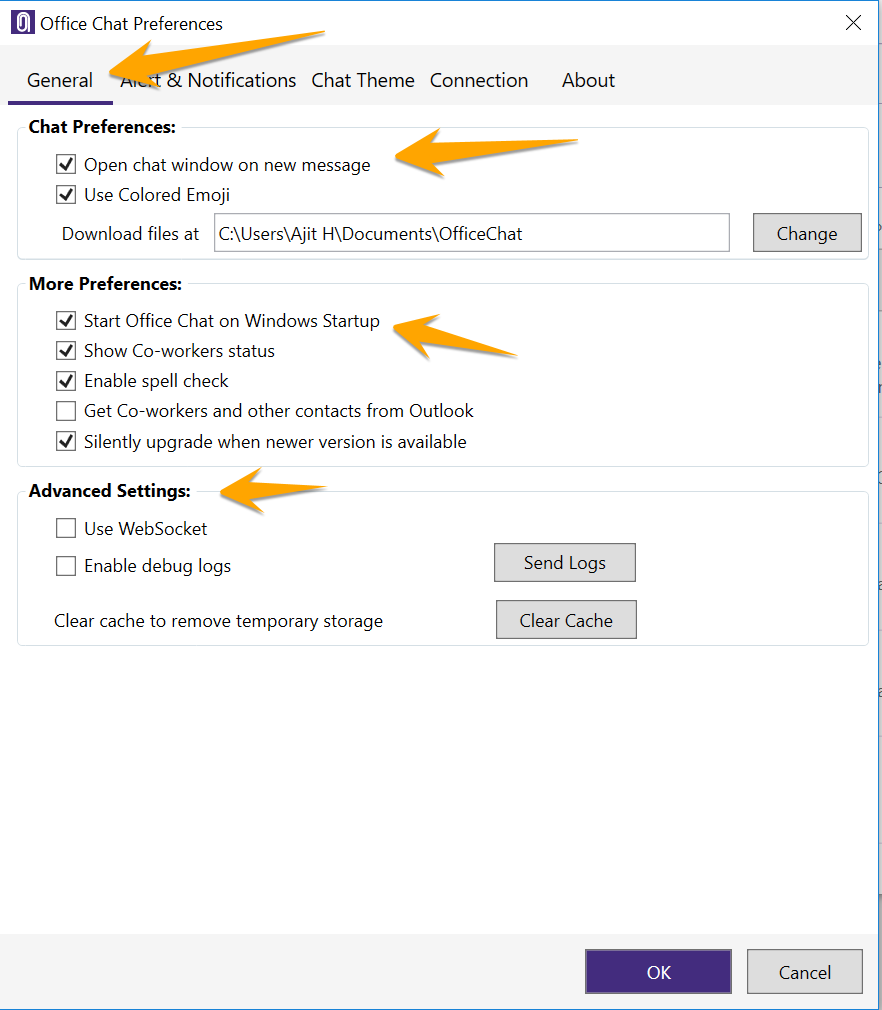
  2. Here Select the Preferences Tab to open the Preferences Dialog box.
  3. Once the preferences dialog box opens, the “General” tab has most of the common preference settings, like starting Office Chat client on Windows startup, Show Co-workers Status, etc.


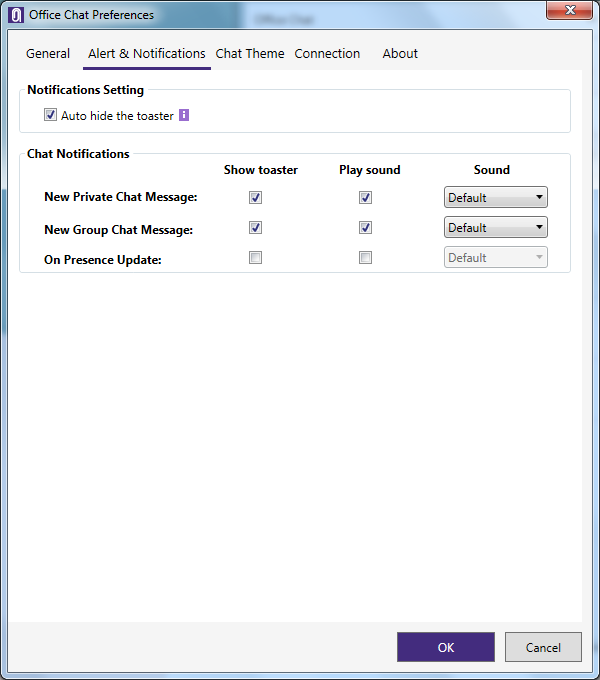
  • If you want to change the Notification Settings for the Office Chat Windows App, go to the application preferences and navigate to the ‘Alert & Notifications’ Tab

Office Chat Windows Notification

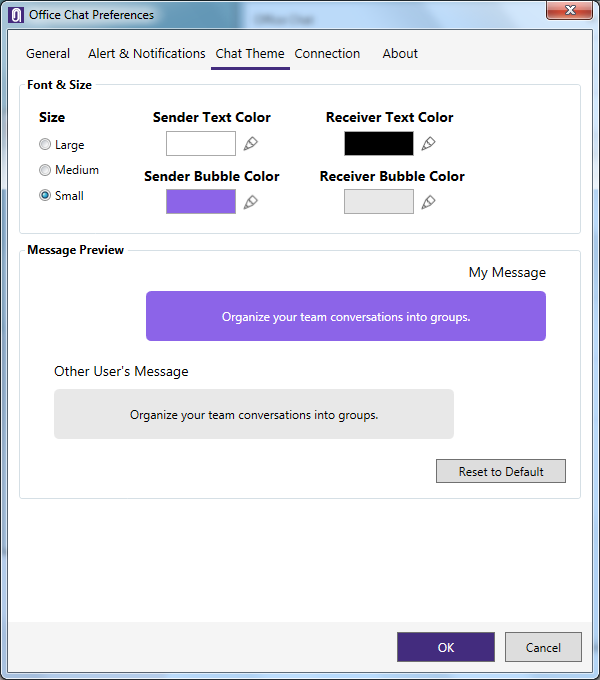
  • If you want to change your Office Chat Theme and display options, Click on ‘Chat Theme’ Tab to modify your preferences.

Office Chat Windows Chat Theme

  • If you are connecting to the internet from behind a proxy server or to check your connectivity with the internet, then use the “Connections” tab to enter the proxy server details.

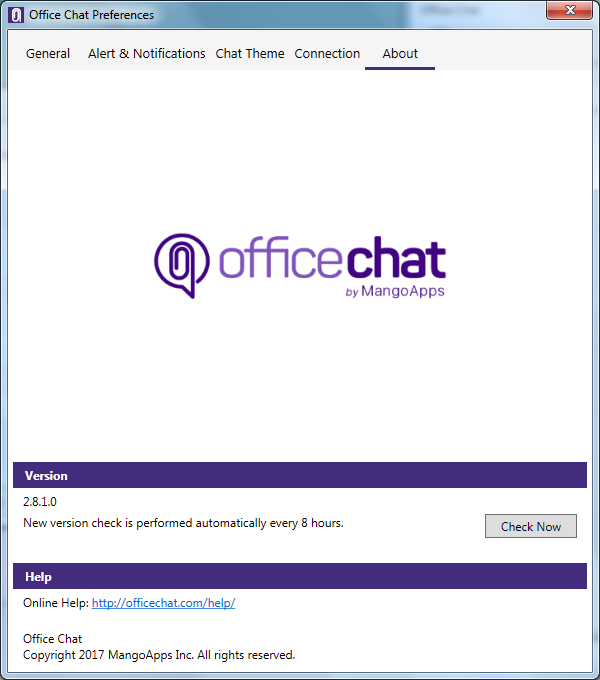
  • If you want to check the Office Chat version and manually update your Office Chat Windows, Click on the ‘About’ Tab.

Office Chat Windows About Us

How do I sign to the Office Chat HIPAA/BAA plan ?

To signup for the Office Chat HIPAA/BAA plan:

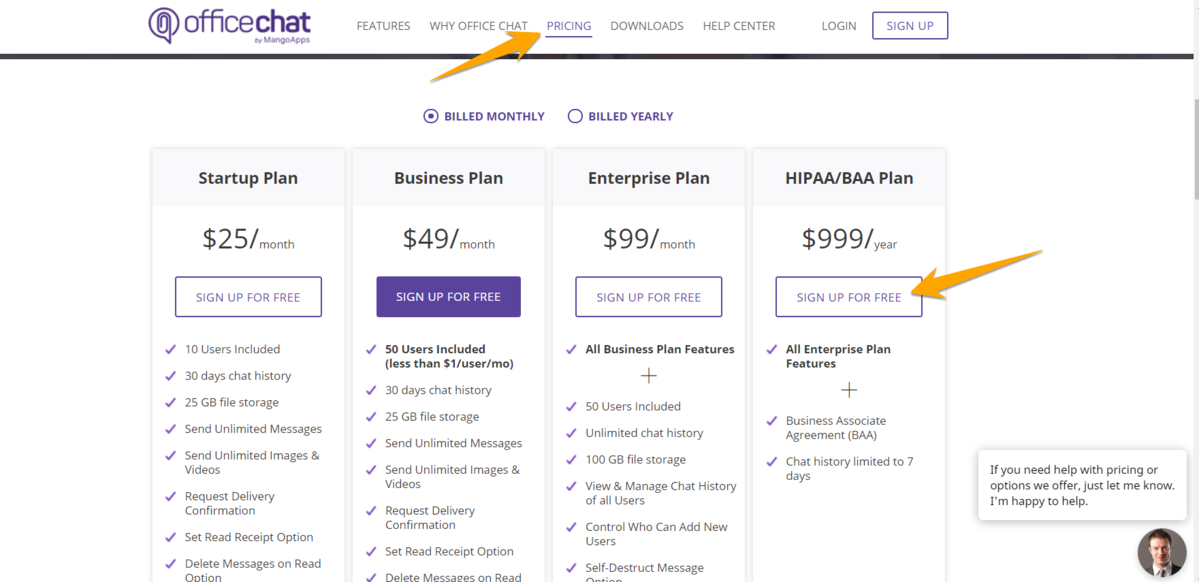
Office Chat offers HIPAA/BAA plan that conforms to the HIPAA‘s security requirements and we have a separate specialized server for total HIPAA compliance. Hence, in order to signup for our HIPAA/BAA plan, we request you to signup for it following the below steps:
2) Under the HIPAA/BAA plan, click on ‘Signup for Free’ button
3) You will have to enter your email id and contact details to complete the signup process

4) Upon creating your account, you will immediately receive a confirmation email with your temporary password

To switch from your current existing Enterprise/Business/Startup plan to HIPAA/BAA Plan:

Office Chat offers HIPAA/BAA plan that conforms to the HIPAA‘s security requirements and has a separate specialized server for total HIPAA compliance.  Hence, another domain will have to be created on the HIPAA/BAA servers and we cannot use your current Enterprise/Business/Startup plan domain.

1) To switch your existing plan to HIPAA/BAA plan, write to us on Support@OfficeChat.com with your existing domain name and the preferred domain name for your new HIPAA/BAA  Office Chat domain. Eg: YourCompanyName.OfficeChat.com

2) We will then delete the non-HIPPA compliant Office Chat domain and create a new Office Chat domain on HIPAA/BAA complaint server as per the name requested by you.
3) You can then log in, complete the billing details and reinvite all your users, to this new HIPAA/BAA complaint domain.
4) Once this the change is complete we will send you a BAA document to print, sign, scan and send back, where we will do the same and send you a completed BAA. You will need this document to be HIPAA compliant. There is no additional cost for this processes or the BAA etc.
Kindly Note:
  • All the amount that was paid towards your Enterprise plan will get adjusted and transferred to your HIPAA/BAA plan on a pro-rata basis.
  • Also, note the billing for Office Chat HIPAA/BAA plan is done annually.
If in case you have further queries, feel free to reach out to us on Support@OfficeChat.com

Test Referral Post

i. https://newmango.mangopulse.com/lp/km-case-study
ii. https://newmango.mangopulse.com/lp/huber-case-study
iii. https://newmango.mangopulse.com/lp/tatts-case-study
iv. https://newmango.mangopulse.com/lp/ovum-report
v. https://newmango.mangopulse.com/lp/hub-critical-for-engagement
vi. https://newmango.mangopulse.com/lp/successful-project-collaboration
vii. https://newmango.mangopulse.com/lp/activity-stream-replacing-email

i. https://www.mangoapps.com/lp/social-intranet
ii. https://www.mangoapps.com/lp/sharepoint-alternative

i. https://www.mangoapps.com/contactus

How to enable integration services in Office Chat?

Popular integration services like can be configured in Office Chat if your domain is on Business/Enterprise plan.
Office Chat works with the services that your group already uses, and we’re adding more all the time!
These integrations automatically let you pull information and activity from an external system into an Office Chat group in a way that’s timely, relevant, and searchable. Office Chat’s integrations will keep your group’s info all in one place.

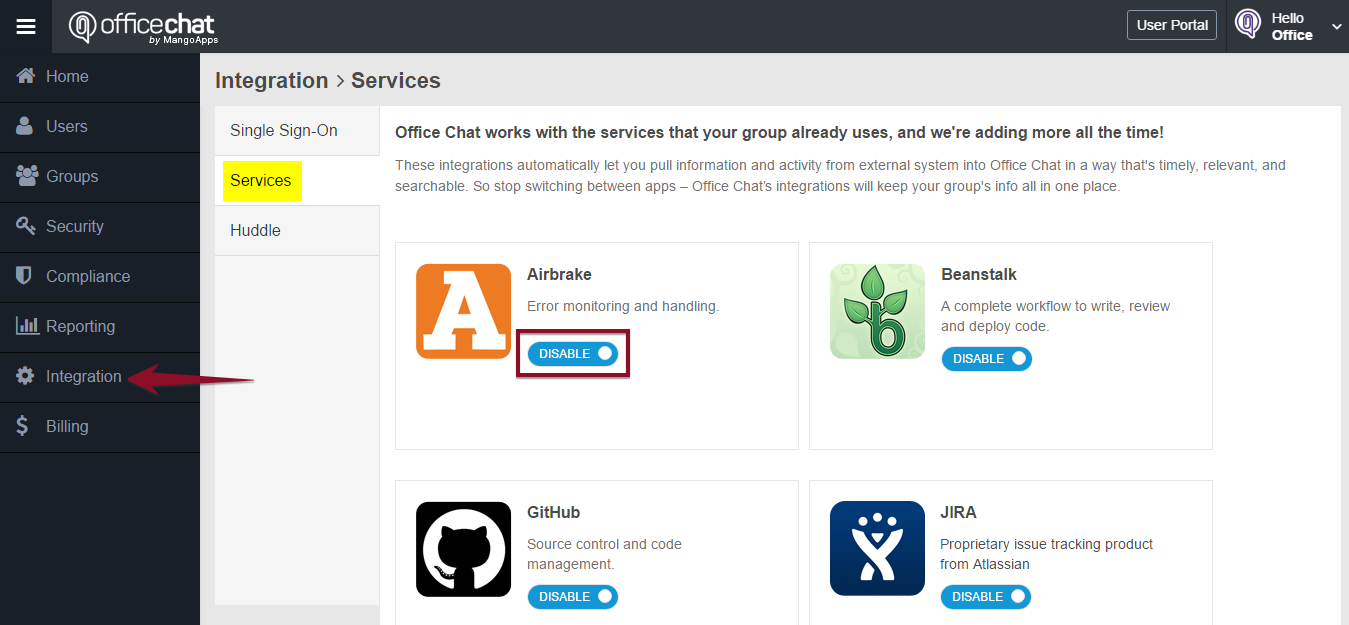
On Admin Portal, the ability to configure integrations is enabled by default. Individual integration services can be enabled/disabled by signing into Admin Portal and navigating to Integrations –> Services.

Admin Portal - Integrations


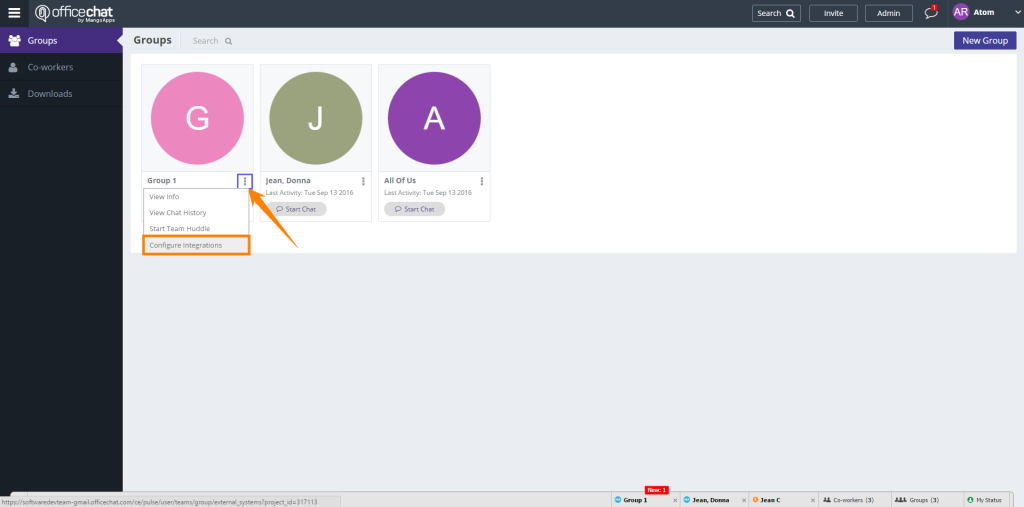
Next step is to create a group for the integration. From the User portal, select the three dot next to the group and select Configure Integrations.

13-09-2016-04-12-34

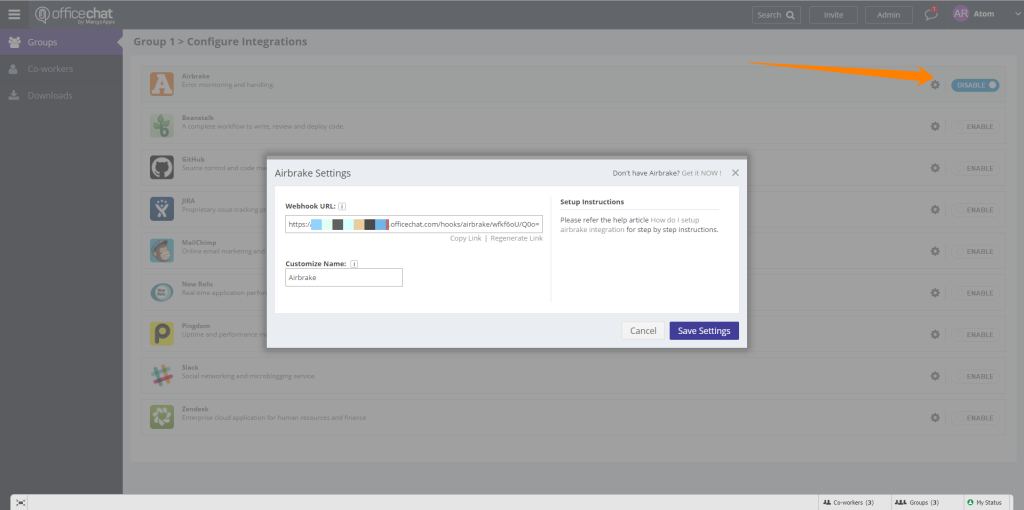
Then Enable and configure the integration of your choice.

13-09-2016-04-16-50