Right now, chat history cannot be disabled in Office Chat.
Archives for July 2014
How do I view/delete group chat history?
July 9, 2014 by
Group Chat History
An Office Chat admin can view and delete a Groups’s Chat History.
Using the Office Chat Admin Portal
- Login to your Office Chat domain URL in a browser with your login credentials and access the Admin Portal.
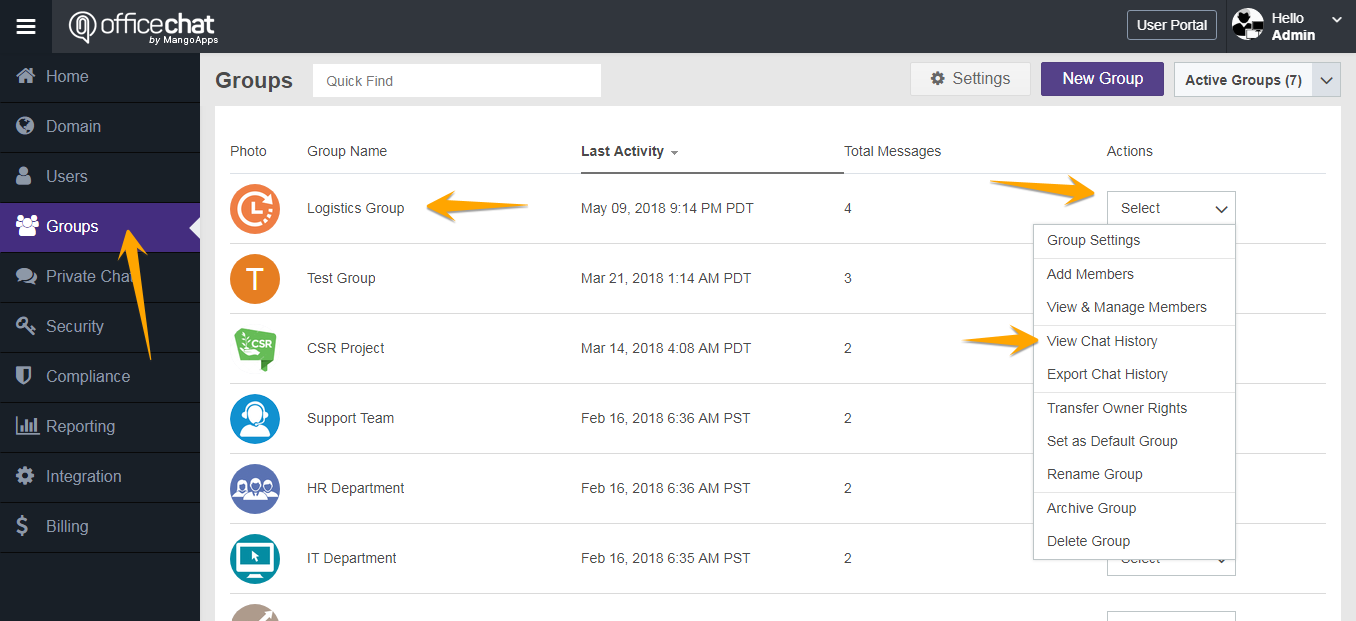
- Choose the “Groups” tab in the left navigation.
- Click on the drop down next to the Group you want to delete messages from and click “View Chat History”.
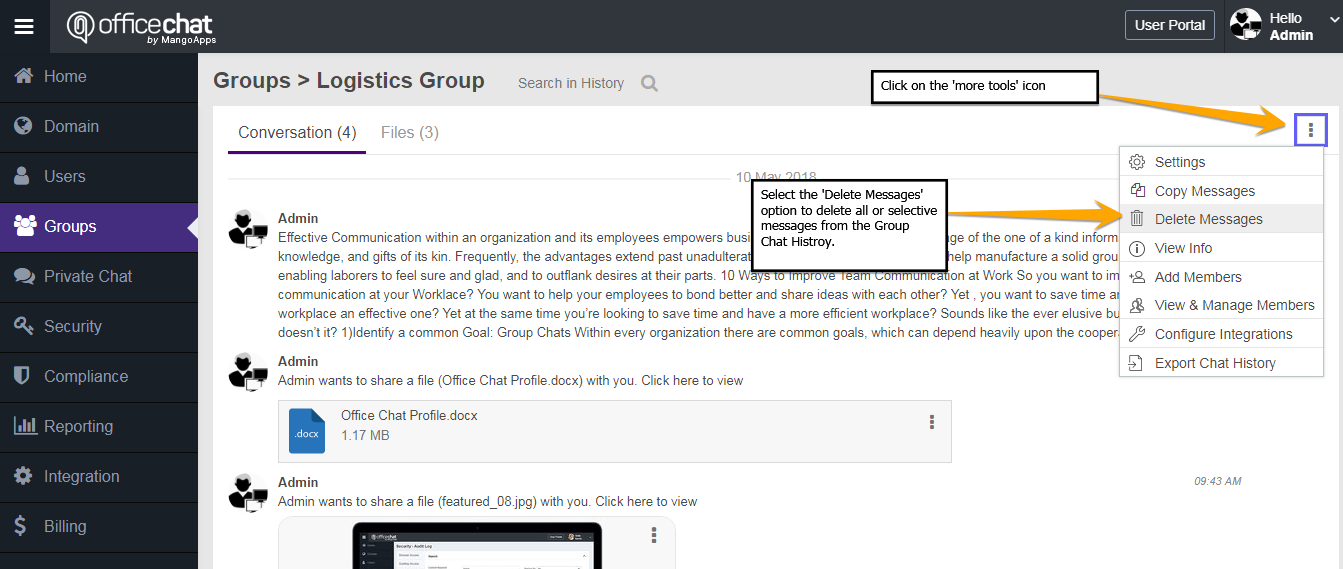
4. To delete the group chat history, click on the ‘More tools’ icon and select ‘Delete Messages’. You can now select to delete all messages or selected messages from the group chat history.
Are files uploaded to Office Chat secure?
July 9, 2014 by
Office Chat is a MangoApps product and MangoApps customer data and information security is our highest priority. Our own success rides on the confidentiality, integrity, and availability of customers’ information. For that very reason, MangoApps is designed with an industry- leading policy for system and information security that addresses the needs of enterprise. The policy is supported by key security measures including:
- Security in the Data Center
- Application-Level Security Measures
- Logical Separation between Networks
- Data Backup and Disaster Recovery
- Thorough Vulnerability Testing
- Firewall and IP Range Protection
- Increased Password Strength Policies
- Separated Browser Session Settings
What happens to my data if I cancel my plan?
July 9, 2014 by
Data in cancelled plans is permanently and irreversibly deleted from the server. Please make sure that you inquire about backing up your Office Chat data in case this capability is available at a later time.
Is there a long-term contract?
July 9, 2014 by
Office Chat has two subscription plans:
- Monthly
- You pay in advance per month and can cancel any time. Canceling in the middle of your monthly term does not incur a refund of any kind.
- Yearly
- You pay in advance for a year and can cancel any time. Canceling in the middle of your yearly term does not incur a refund of any kind.
** If a multi-year contract is required, please contact Office Chat Sales: (425) 474-9950
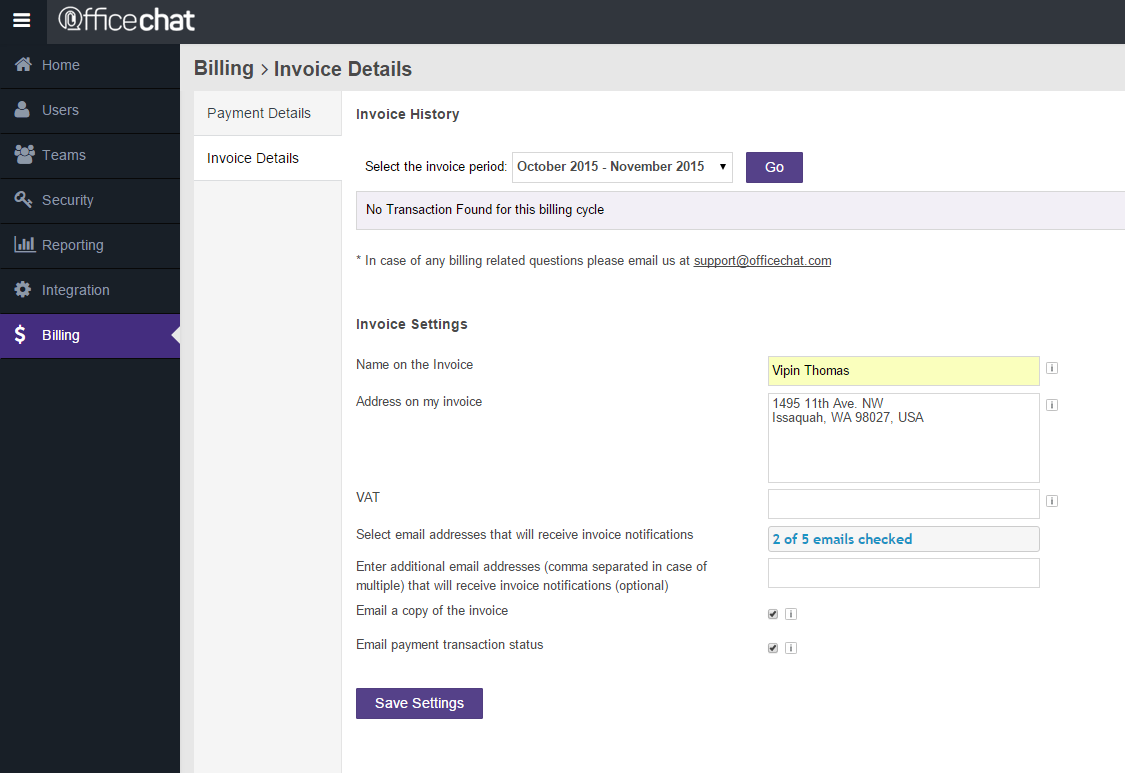
How do I cancel my Office Chat account?
July 9, 2014 by
We’ll be extremely sorry to see you go. However, if you would still like to delete your Office Chat account follow instructions here:
- Login to your Office Chat account from the web.
- Navigate to the admin portal then click on “Billing” -> “Invoice Details”
- Click on “Please cancel my account” please ensure you state the reason why you wish to cancel along with your feedback & suggestions
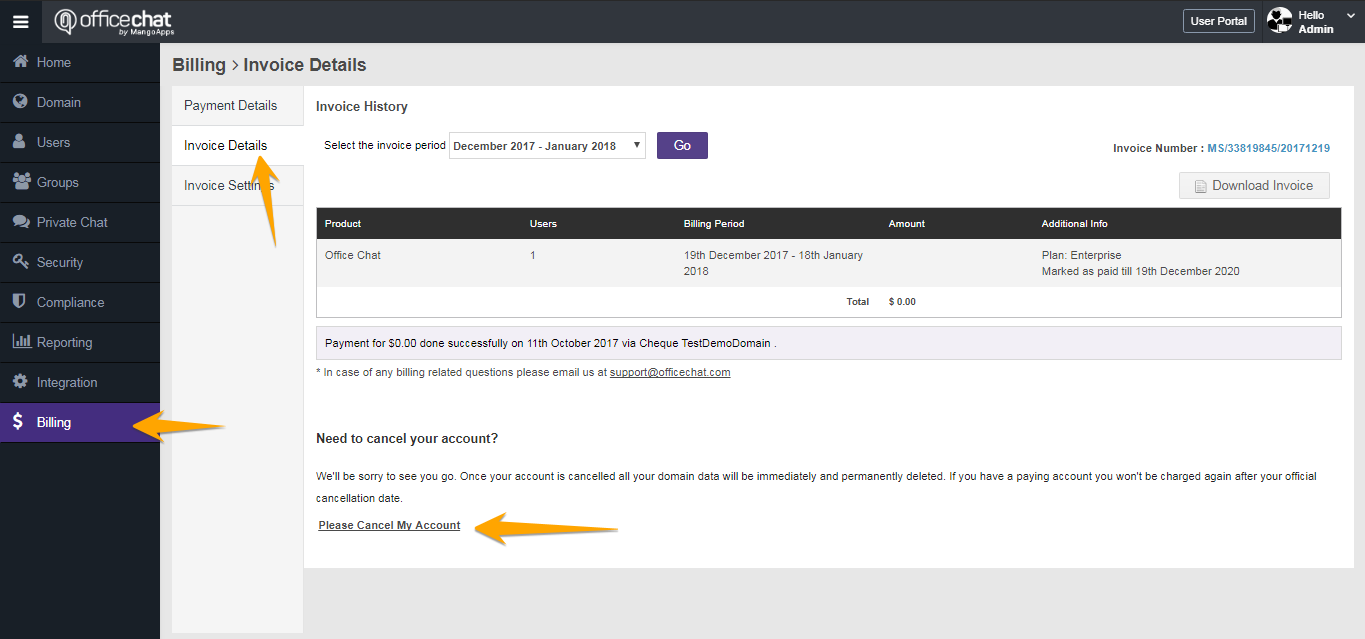
Kindly note, once your account is cancelled all your domain data will be immediately and permanently deleted. If you have a paying account you won’t be charged again after your official cancellation date.
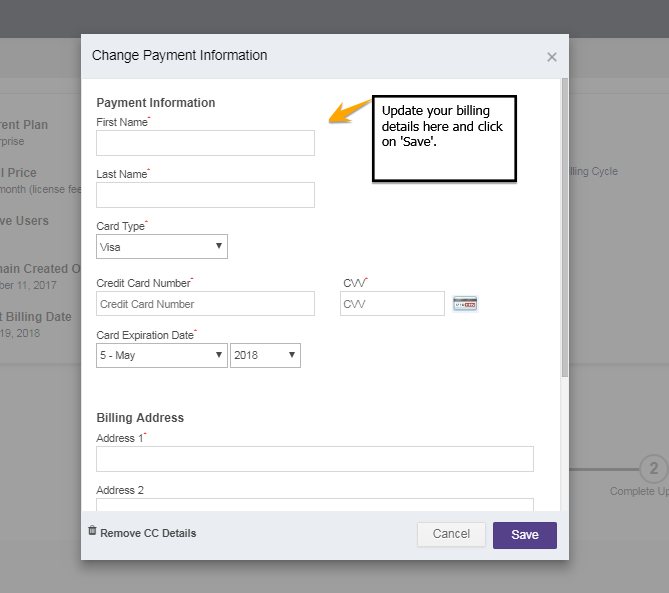
How do I change my billing information?
July 9, 2014 by
To change your billing information in Office Chat:
- Sign in to Office Chat on the Web then navigate to the admin portal
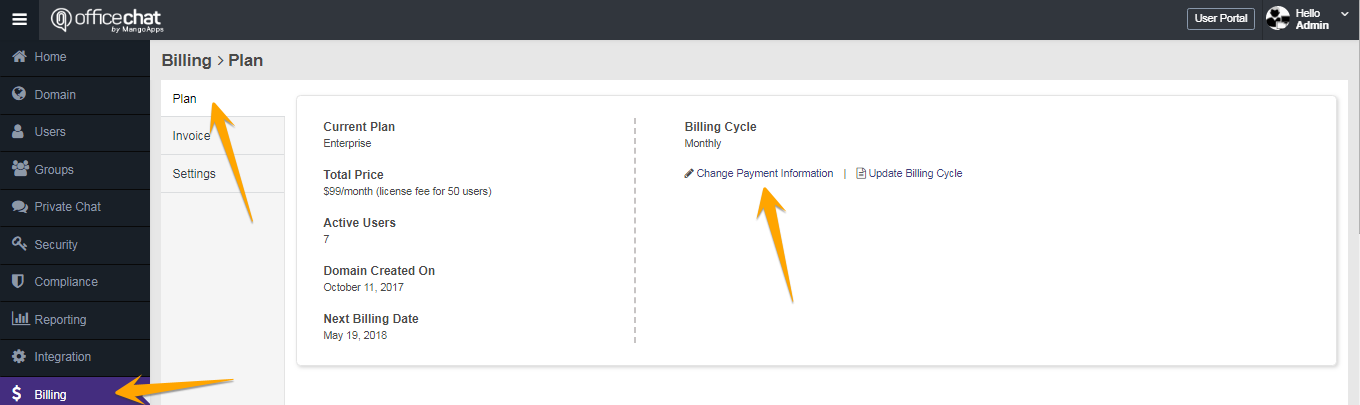
- Click on “Billing” from the left-hand navigation.
- Under ‘Plan’ tab, click on ‘Change Payment Information’
- Change and enter valid credit card details and click on “Save” button.
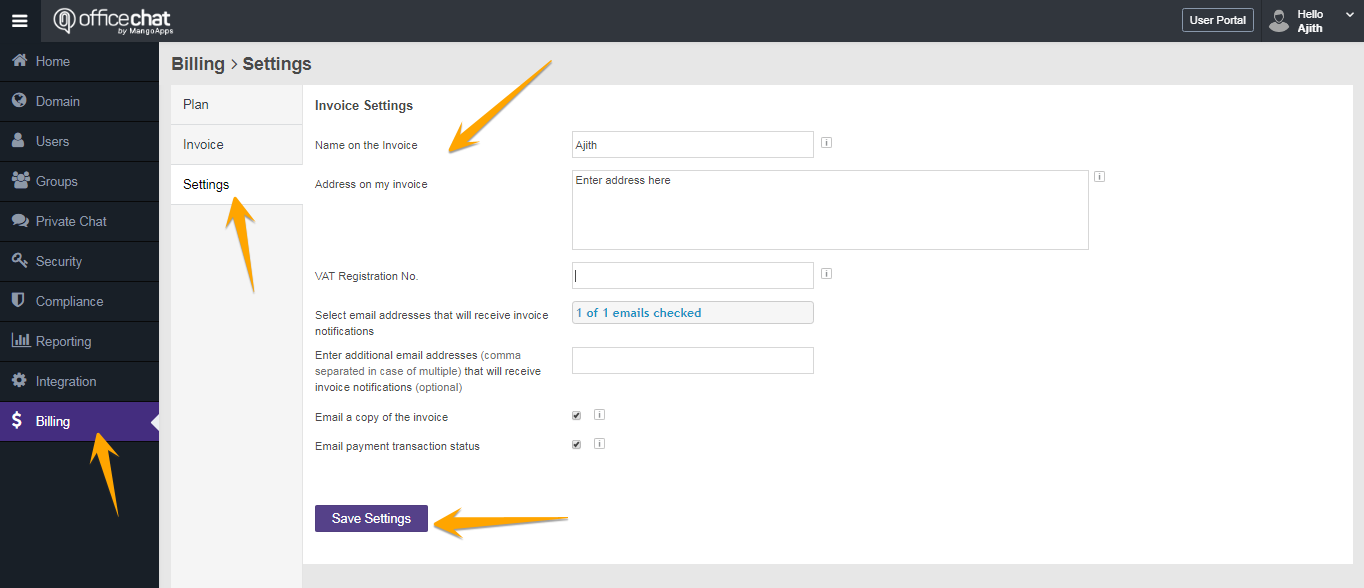
How do I change my billing contact information?
July 9, 2014 by
To change your billing contact information:
- Use a web browser to log into your Office Chat domain.
- Navigate to the admin portal
- Click on the “Billing” from the left navigation and then on ‘Settings’ tab
- Change the details listed here then click “Save”:
Can I cancel or change my plan anytime?
July 9, 2014 by
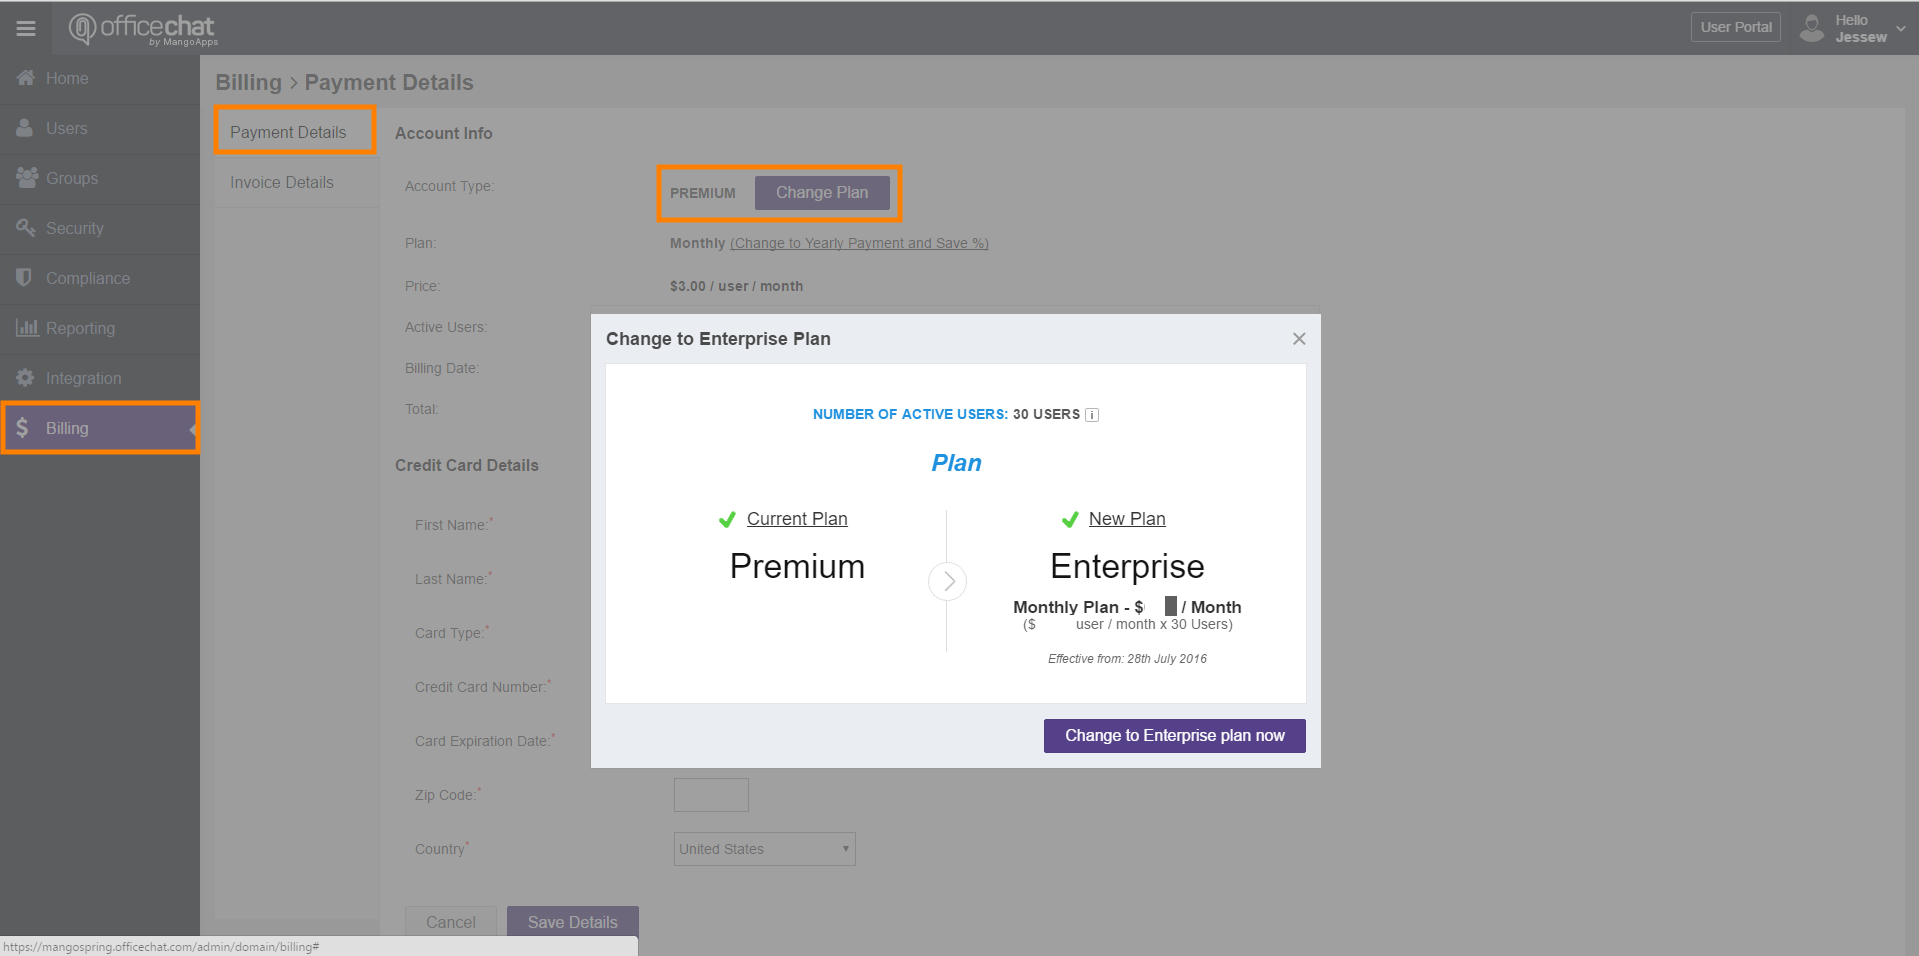
Yes, you can change or cancel your paid or free Office Chat subscription any time.
From Basic you can click on the admin button if you are the account owner. This will take you to a payment page.
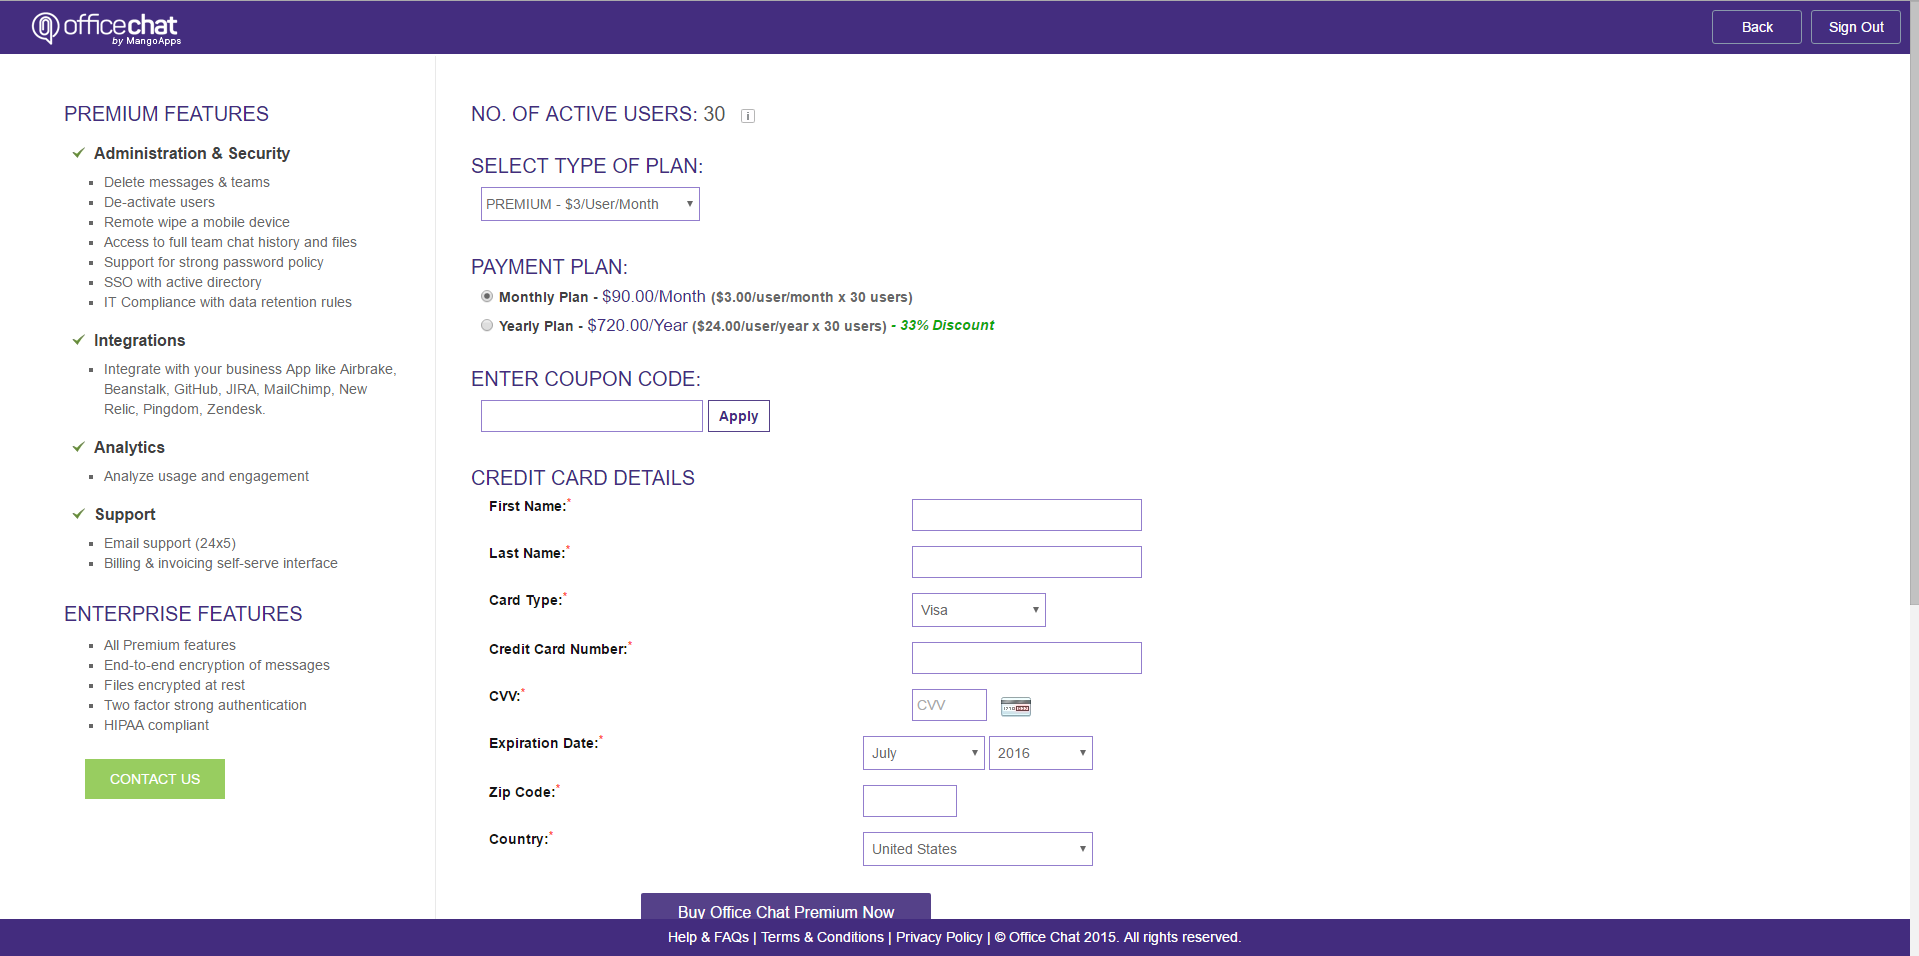
From Premium or Enterprise you can change your plan in the admin portal. Under billing > Payment details, select “Change Plan”
If you have a Basic plan and need to delete your Office Chat. Or you have a Premium or Enterprise account and need to revert to a Basic plan. Please have the account owner send us an email at Support@Officechat.com
Please include what you need performed and the domain name.
Lastly to cancel your paid for account, see this article here
How do I enable logging and report a problem?
July 9, 2014 by
Logging helps support diagnose the issue quickly if there’s a problem with Office Chat. To enable it, choose the platform below and follow the steps:
iOS
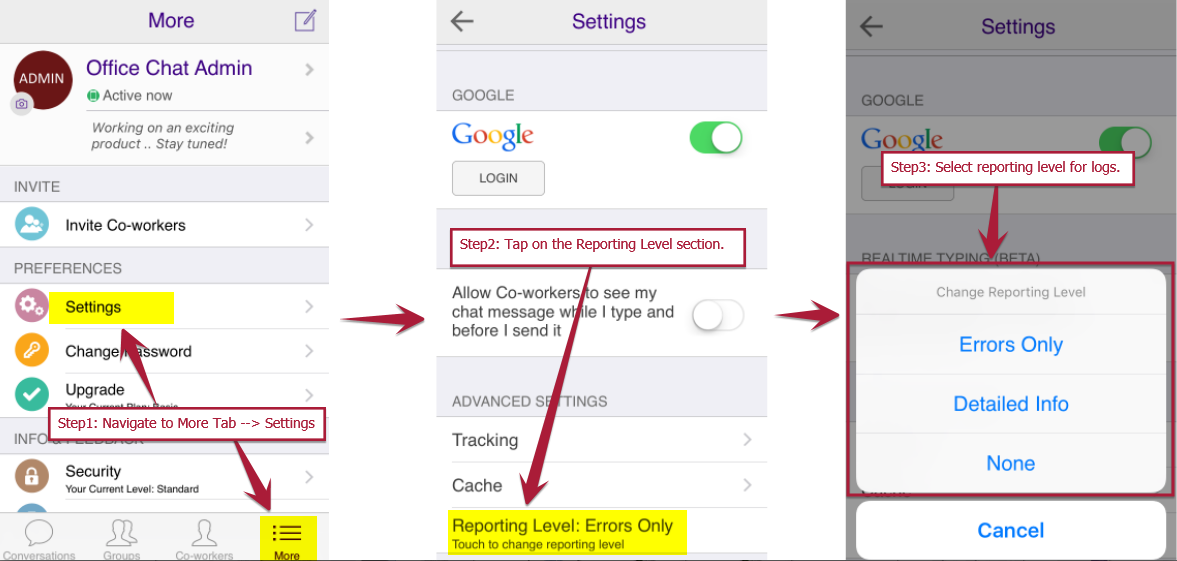
- Tap on “More” and tap on “Settings”
- On Settings screen, scroll down and tap on “Reporting Level” and select the reporting level for logs.
- By default, reporting level is set to “Errors Only”. It is advisable not to set the reporting level to “None”
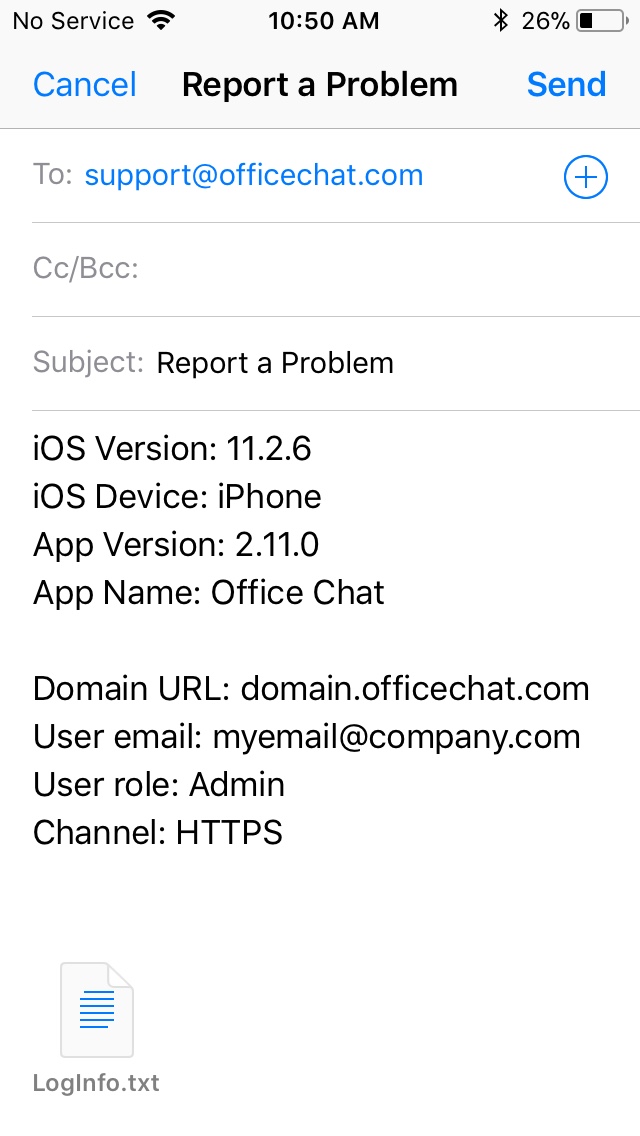
- Once this is done, please click on More Tab –> Report a Problem. Enter additional information (if any) in the auto-composed email and send the email.
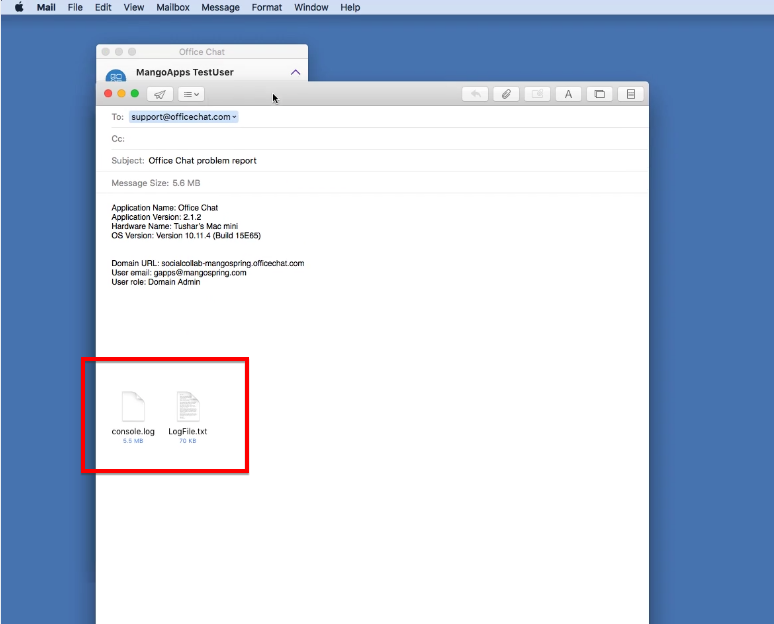
The next screen will pull up the report to send, typically the defaults are fine but ensure your recipient information is correct one to use in the “user email:” section.
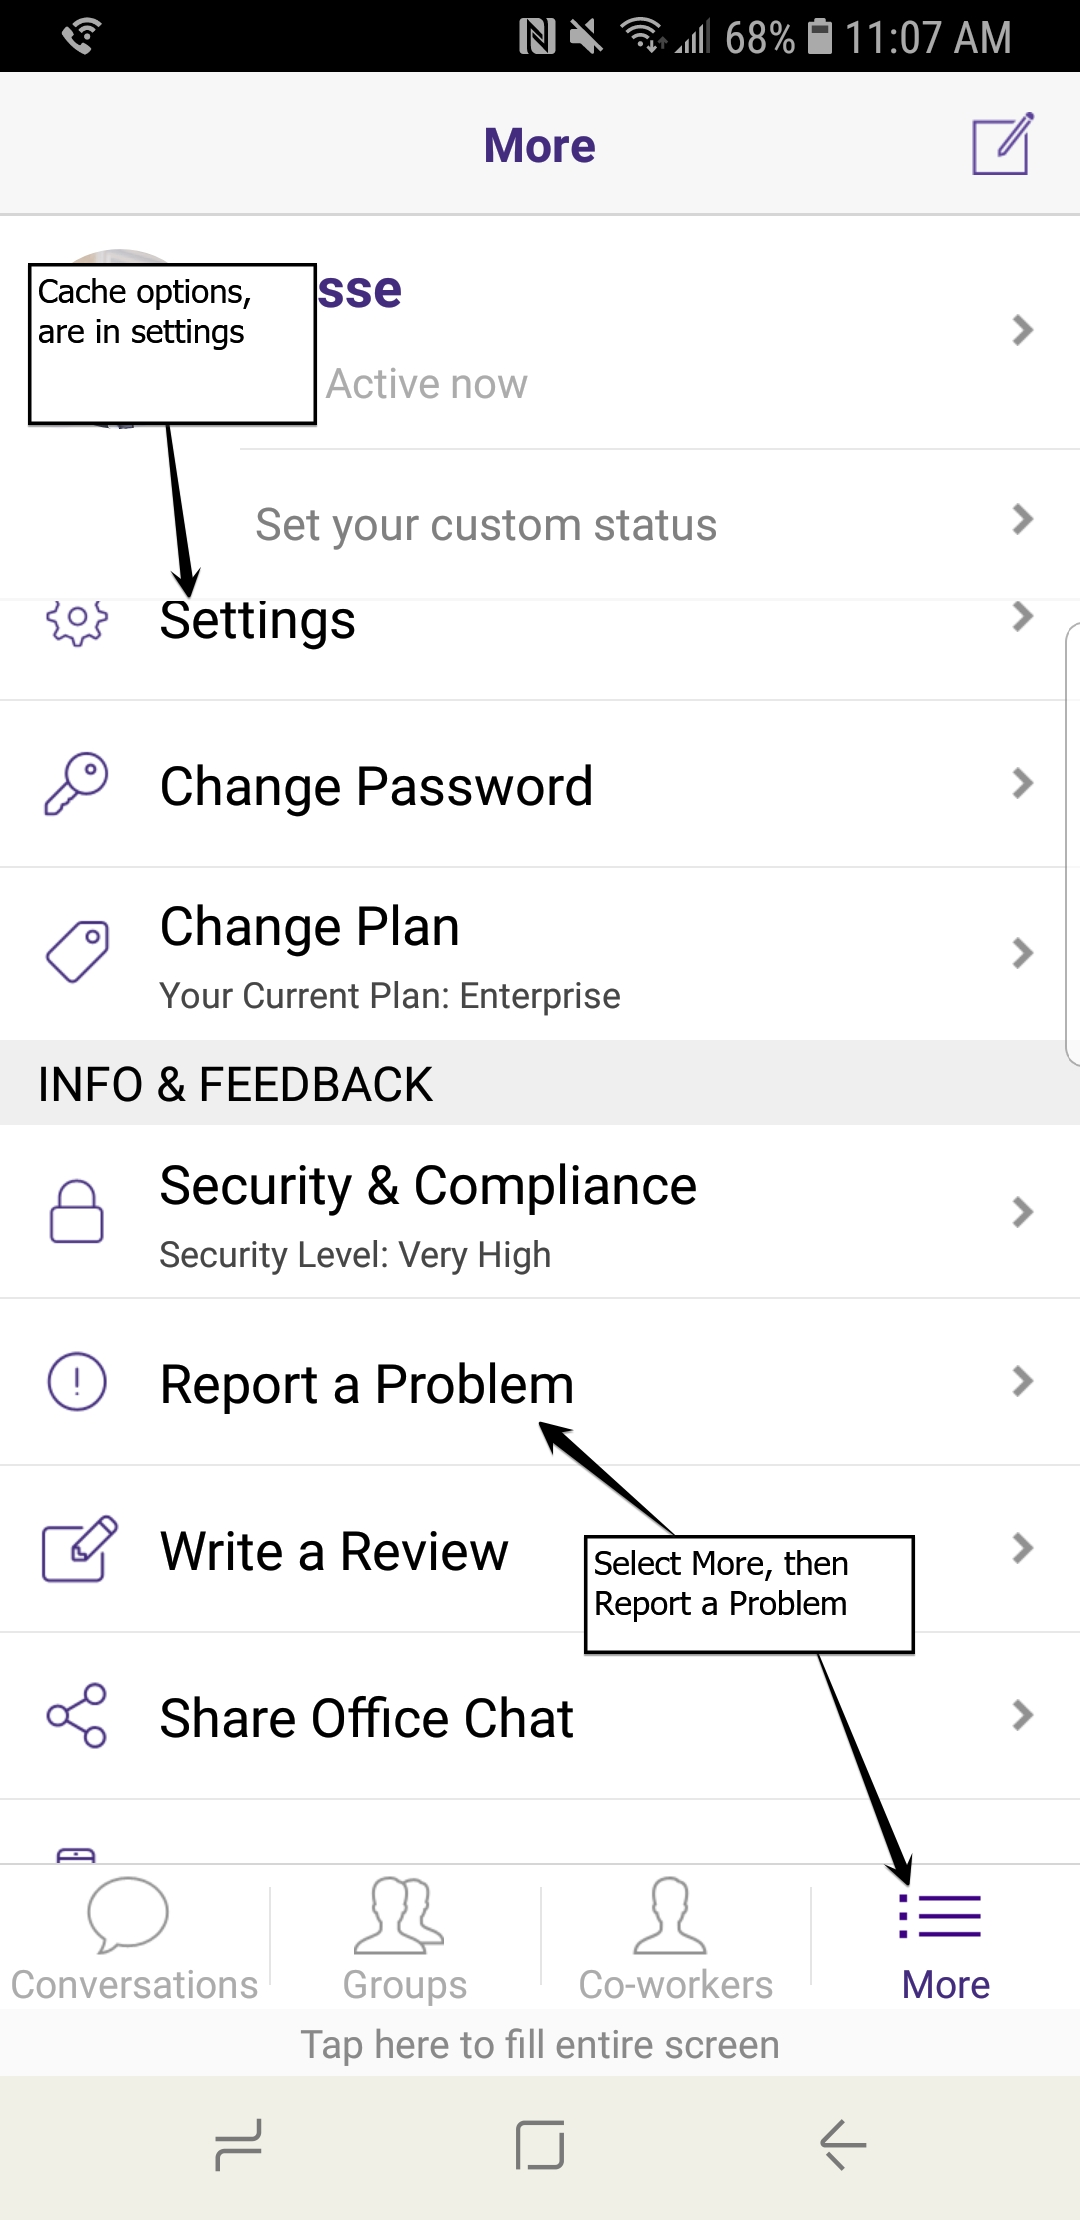
Android
In Office Chat Android, by default, reporting level is set to “Errors Only” and cannot be changed. The steps are mostly the same as iOS seen above. Select More > Report a Problem. as before ensure your recipient information is correct one to use in the “user email:” section.

Office Chat for Windows
Go to Office Chat Settings –> Preferences –> check the checkbox for “Enable debug logs” and click OK button. Please refer the below video for steps:
Office Chat on Mac
Select Office Chat, now at the top menu bar select Office Chat,
from the drop down select report a problem.
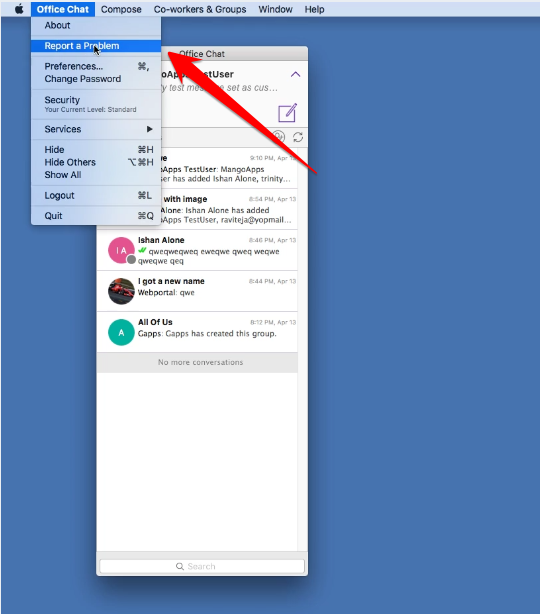
Once selected an e-mail box will appear with the logs attached.
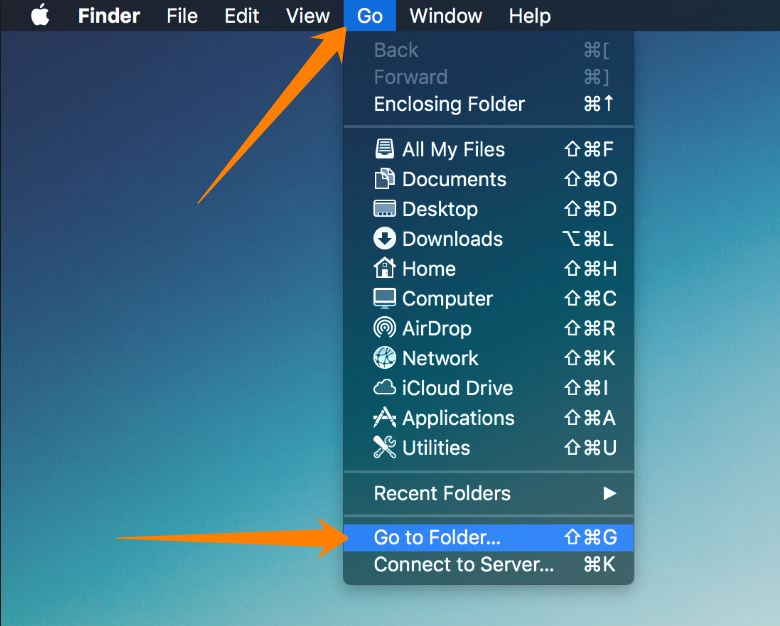
MAC OS, an alternative method to send the Logs.
Open the “Go to Folder” menu
1. Open the Finder
2. Go to the Menu Bar and open the “Go” menu.
3. Select the entry “Go to Folder…”
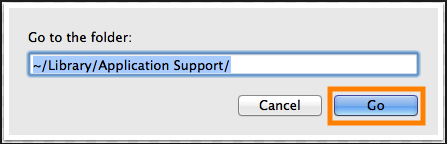
Enter the path to the Application Support folder.
1. Copy and paste the following path in the the “Go to Folder” text field.
~/Library/Application Support
2. Then click on “Go” to open the folder.
Next is to locate com.mangoapps.officechat folder and ZIP the log folder and send it to support@mangoapps.com or attach it to an existing ticket.