As part of your Office Chat Enterprise subscription, your users can be authenticated through LDAP and Active Directory. This article will step you through the process by answering:
Where can I find the LDAP configuration settings in the Admin Portal?
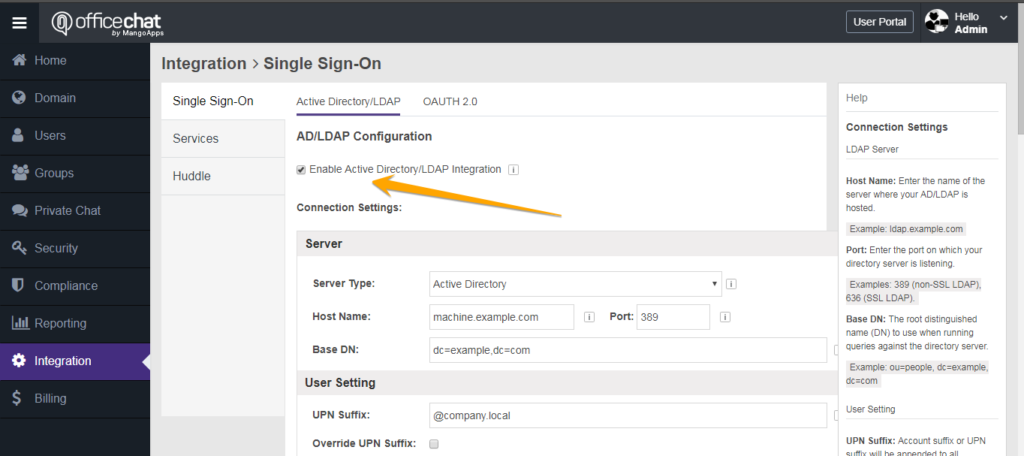
- Using the Web Client, Go to Admin Portal, then click on Integration & Under ‘Single Sign-On’ , Enable the checkbox “Active Directory/LDAP Integration”

What access do you need to integrate your active directory / LDAP server?
- You will need to allow incoming access from the IP address: 50.16.226.155
- You will need to allow incoming access to LDAP port 389 and secure LDAP port 636
What do the different configuration fields mean?
- Server Type & Account/UPN Suffix: You have a choice between “Active Directory” and “OpenLDAP” servers. Choosing “Active Directory” enables the additional “User Setting” section where you define the account suffix (UPN Suffix) that is configured for your AD.
- Host Name & Port: The LDAP server and port you are connecting to.
- Base DN: The base distinguished name of your LDAP used for the base search.
- Administrator DN & Password: User authentication for a user that has search capability and is able to perform all read-only directory operations.
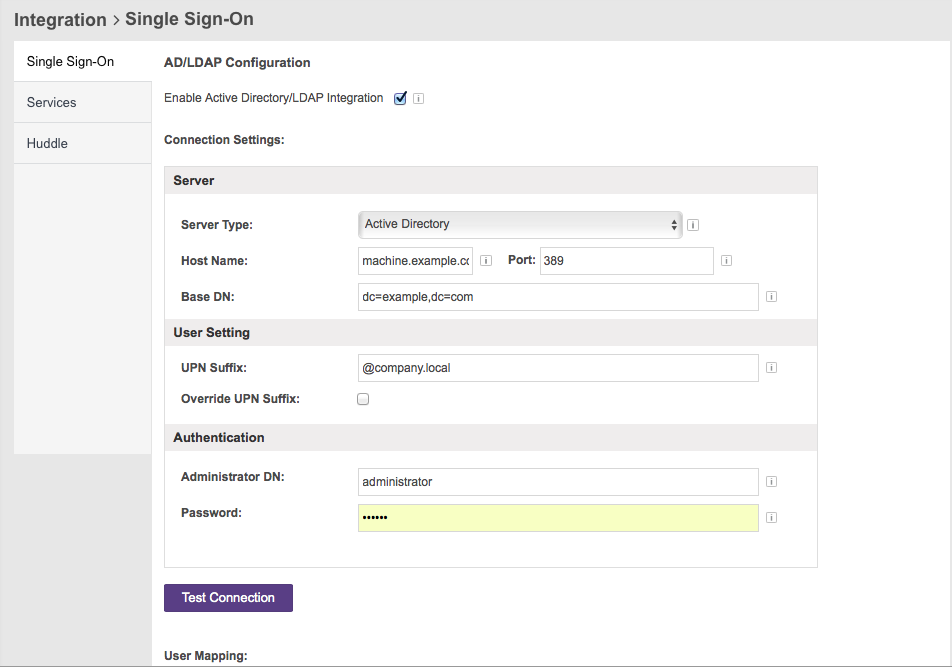
What do all the fields mean in Connection Settings of the LDAP/AD configuration Page?

To go through each choice and setting one-by-one:
- Server Type & Account Suffix: You have a choice between “Active Directory” and “OpenLDAP” servers. Choosing “Active Directory” enables the additional “User Setting” section where you define the account suffix (UPN Suffix) that is configured for your AD.
- Host Name & Port: Enter the name of the server where your AD/LDAP is hosted, example: ldap.example.com. Also, enter the port on which your directory server is listening, examples: 389 (non-SSL LDAP), 636 (SSL LDAP).
- Base DN: The root distinguished name (DN) to use when running queries against the directory server. Example: ou=people, dc=example, dc=com
- Groups Base DN: is the base distinguished name of your AD used for the base search.
- UPN Suffix: Account suffix or UPN suffix will be appended to all usernames in the Active Directory authentication process. (e.g @company.local). Don’t forget to put the @
- Administrator DN & Password: User authentication for a user that has search capability and is able to perform all read-only directory operations. Enter a distinguished username & password of a user that will allow Office Chat to connect to the directory server. Connecting to the directory server requires that Office Chat log in to the server with the username and password configured here.
For Step 2 of Configuration, what do I put in each of the fields?
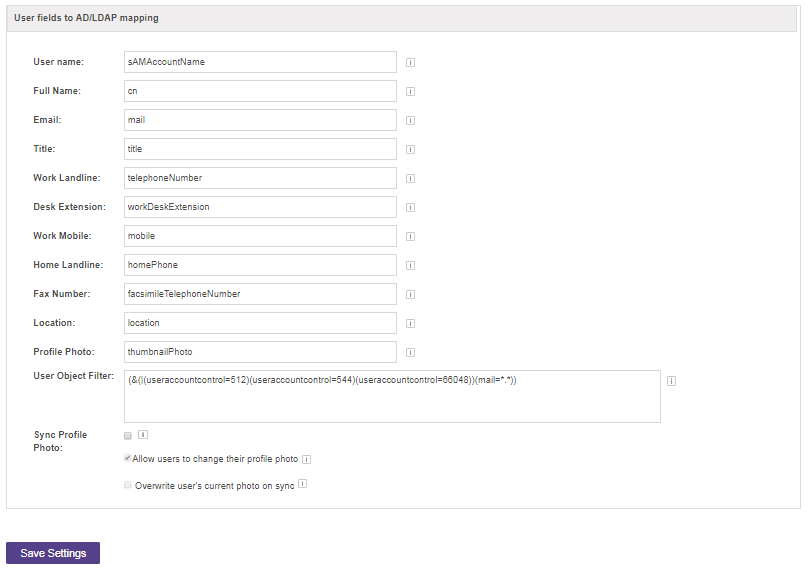
Note: All user profile fields will be synced when the user logs in or a manual sync are performed.
- Username: The field name on which username lookups will be performed on. If this value is not set the default value is uid. Active directory users should try the default value of sAMAccountName.
- Full Name: Users’ full names.
- Email: Users’ emails.
- Title: Users’ position titles.
- Work Landline: The mapping for users’ work landline telephone number.
- Desk Extension: The mapping for users’ work desk extension numbers.
- Work Mobile: The mapping for users’ work mobile phone numbers.
- Home Landline: The mapping for users’ home landline telephone numbers.
- Fax Number: The mapping for fax information.
- User Object Filter: Is used to restrict the numbers of users that are permitted to access Office Chat. In essence, the filter limits what part of the LDAP tree Office Chat syncs from. The most common usage of a search filter is to limit the entries that are users based on objectClass. For example, a reasonable search filter for a default Active Directory installation is:
(objectClass=organizationalPerson)
When combined with the default filter, the actual search executed would be:
(&(sAMAccountName={0})(objectClass=organizationalPerson))
A filter should be written for user membership. This ensures that you are not flooding your Office Chat domain with users that do not need access to your content. When constructing a filter it is best to pick a common attribute of the set of users you want to allow access to Office Chat. For example, if my users are distinguished by having two objectClass attributes (one equal to ‘person’ and another to ‘user’), this is how I would match for it:
(&(objectClass=person)(objectClass=user))
Notice the ampersand symbol ‘&’ symbol at the start. Translated this means: search for objectClass=person AND object=user
Alternatively, (|(objectClass=person)(objectClass=user))
Translated this means: search for objectClass=person OR object=user.
The pipe symbol ‘|’ denotes ‘OR’. As this is not a special XML character, it should not need escaping.
If you know that only some of the users in your LDAP database should be known to the application, one way to get that subset is to create an LDAP department (such as ‘managementteam’), then filter off that department attribute for users. Here’s an example:
(&(objectClass=uidObject)(department=managementteam))
This way you don’t have to create any new OUs or move records around. You can simply modify department membership attributes on the user, something the LDAP administrator can do.
Where can I find references on LDAP filter syntax?
Although there are innumerable sites on the internet that cover some aspect of LDAP filter syntax, two examples are:
- LDAP Query Basics
- Active Directory: LDAP Syntax Filters
- A more general one on LDAP.
Customer user filters range from very simple to very complex. Here are two examples. Notice that one customer differentiates by “postalCode” and another uses various “useraccountcontrol” values.
- (&(&(|(useraccountcontrol=512)(useraccountcontrol=544)(useraccountcontrol=66048))(mail=*.*)(postalCode=FS)))
- (&(|(useraccountcontrol=512)(useraccountcontrol=544)(useraccountcontrol=66048)(useraccountcontrol=4194816)(useraccountcontrol=4260352))(mail=*.*))
What tools can I use to troubleshoot the LDAP filter for too few or too many users?
We use the command-line tool LDAP search. There are other command line and graphical utilities out there. Please let us know if you have a specific question about setting up your LDAP filter.
How often should I manually synchronize my LDAP configuration?
Since the changes to your LDAP users are applied every day, there’s no need to manually synchronize unless you’ve made changes to your users that you want to see in Office Chat right away.
Can I “Suspend” or “Change Users’ Passwords” in Office Chat when Authenticating through LDAP?
When LDAP is enabled, it controls all users in your domain. Suspending or changing users’ passwords will not affect LDAP users, only those guest users or network users that are not part of your LDAP.
Do LDAP settings overwrite mapped values that user may have changed in Office Chat on Sync?
LDAP, for the most part, is treated as the master record of user data when synchronizing with Office Chat. Mapped user data that users may have changed in Office Chat will be overwritten with their LDAP mapped field when an LDAP sync occurs. So fields like “User Name”, “Email”, “Title” and “Work Landline” that are Office Chat fields will be overwritten by their LDAP mappings.
How do I log in once LDAP is configured?
Users log in to Office Chat using their unique identifier (UID) and LDAP password once LDAP is configured in Office Chat. Passwords are controlled through LDAP so users and admins cannot change passwords from Office Chat but rather passwords must be changed in LDAP.
When and how frequently is AD synchronized with Office Chat?
Office Chat can be set to sync automatically with AD up to once per day or every hour. The sync happens at approximately 1:00 AM Pacific Time. To set autosync for AD:
- Go to the “Admin Portal” -> “Single Sign-On” -> “LDAP / AD” page.
- If your configuration has already been saved, at the very bottom of the page, place a check in “Auto-sync Office Chat with enterprise AD/LDAP” choose between once every or every hour and click “Save”.
Please take note that the hourly sync will include the following
1. User gets activated/deactivated(if setting enabled).
2. New users get created
3. New groups get created
4. Email change/samaccount change also happens
Once every 24 hours, a full sync will be performed that will include everything.
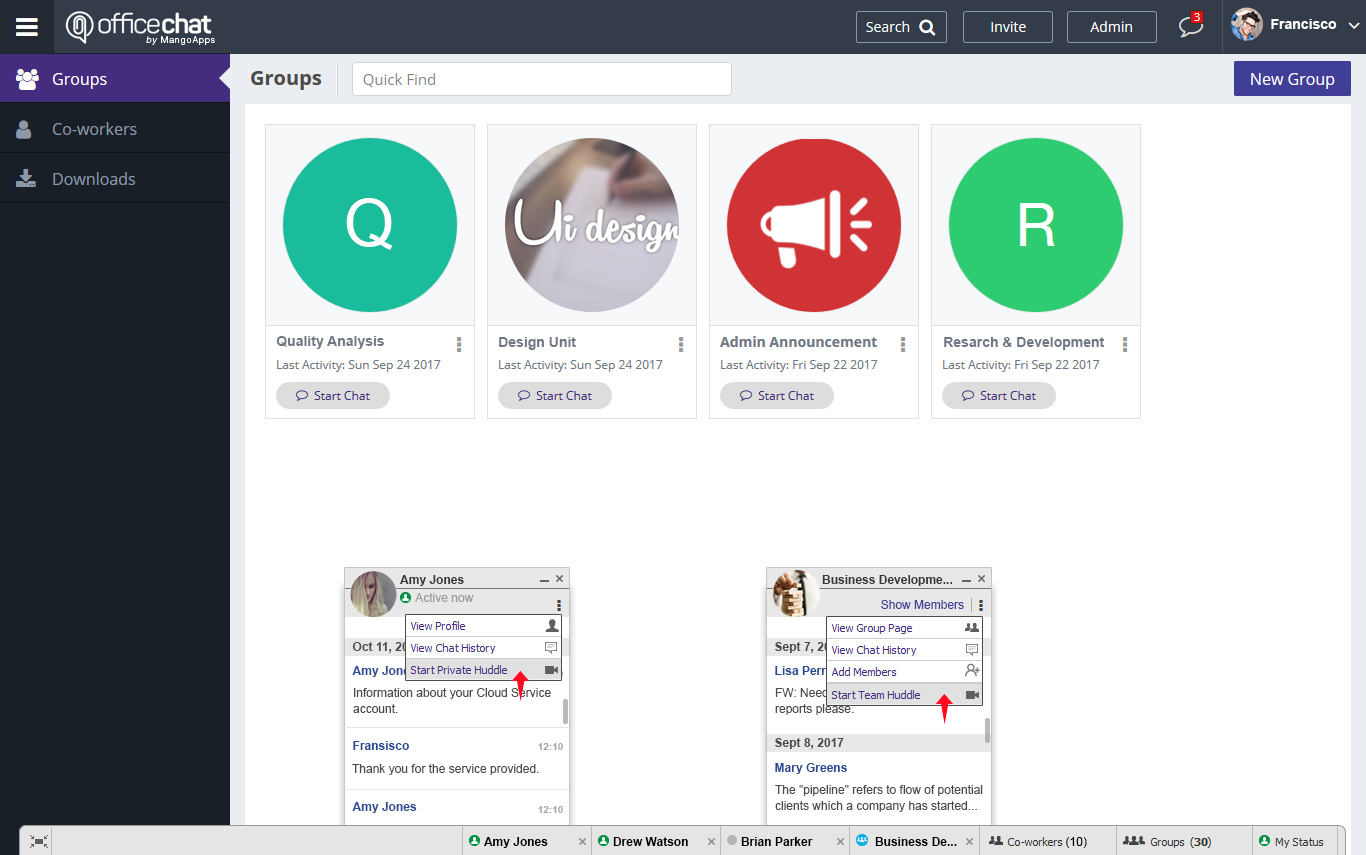
 Once Huddle is enabled, the integration will be available from private chat and team chat on the IM bar by clicking on Start a private huddle or Start a team huddle action items.