This article will show you how to invite people in bulk to your Office Chat network.
If the network admin wants to invite a large number of users to the Office chat portal, then you can do it by using the “Import CSV” feature in Office Chat.
Steps to import users from CSV
I. Creating a CSV file
To invite users by importing them from a CSV file. First, you need to create a CSV file with the first line being the field headings and all subsequent lines being field values for each user to be invited.
Notes on CSV Files
- It’s recommended that each field is surrounded by quotes. This means that each value must not contain any quotes of their own so please pay close attention to the CSV file must be made accurately and include no quotes for field’s value.
- For users’ fields that do not have values, there should be nothing between the quotes such as in this example where the user “Will Smith” has no “title” in the 5th column:
"name","firstname","lastname","email/login","title","mobile","Enabled"

"Will Smith","Will","Smith","willsmith@gmail.com","","(+91)1234123411","TRUE"
- Each user must have the same number of fields, even if they are empty, as there are field headings in the CSV file.
- Description of Enabled flag value:-
- TRUE- This will activate an existing user if the current status is Deactivated. If the user is not present in the domain, then the user will be created.
- FALSE – This will deactivate an existing user if the current status is Activate. If the user is not present in the domain, then the user will not be created.
- – If the Enabled field is left blank, then the user state will not be touched.
The format of the CSV file is below. The first line is the field headers, and subsequent lines are users that will be imported.
“Will Smith”,”Will”,”Smith”,”willsmith@gmail.com”,”Director”,”(+91)1234123411″,”johnny_depp@yahoo.com”, “TRUE”
II. Importing the CSV file
Once the CSV file has been created, it is ready to be used to import users to Office Chat. To invite users from your CSV file:
- Go to the Admin portal of your Office Chat domain.
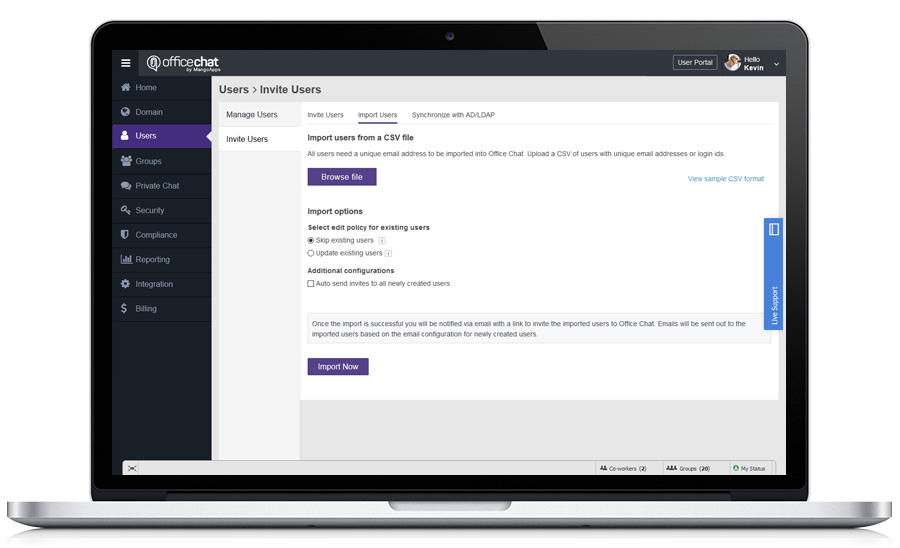
- Choose “Users” -> “Invite Users” -> “Import Users” tab
- Choose between “Skip existing users” or “Update existing users” (Please note that if you select Skip existing users”, then this would skip updating the existing users. It will only add the new users found in the uploaded CSV. If you select “Update existing users”, then it would update all the users already present in the database with new values from the uploaded CSV. Additionally, it will create new users that are found in uploaded CSV.)
- You can check or uncheck Additional configurations ” Auto send invites to all newly created users.”
- Click the “Choose file” button and navigate to the CSV file you created.
- Click the “Import Now” button.
- No emails will be sent out to the imported users. Once the import is successful network admin will be notified via email with a link to invite the imported users to Office Chat.
Screenshot:
Video: