Concepts
- Groups in Office Chat are group conversations between 3 or more participants (including yourself)
- A group can be renamed to a name that you choose indicating it’s purpose. Any member can rename the group.
- A group can have a picture associated with it that represent’s it. Any member can set the group picture.
- Groups show up in your “Conversations” and “Co-workers & Groups” tabs for easy access.
Office Chat for Windows:
The same compose icon can be used to start both 1-0-1 and Group Chat. Simply insert multiple co-workers’ names/email IDs in the recipient text area and send a message to start a Group Chat.
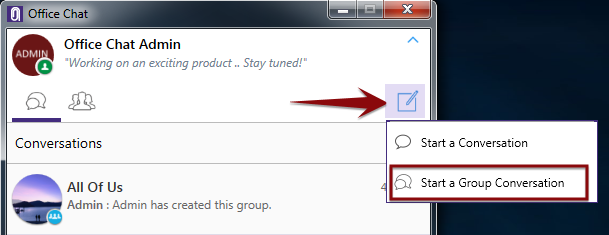
A pop up help message will come up informing that group chat can also be started with a normal chat window. Click “OK”
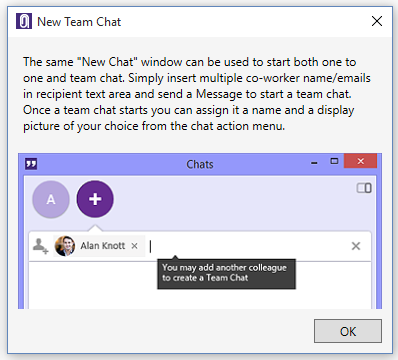
A new chat window will open. Start typing names of your co-workers or email addresses on the top. Once done, enter a message. The group will get created. It’s that simple!
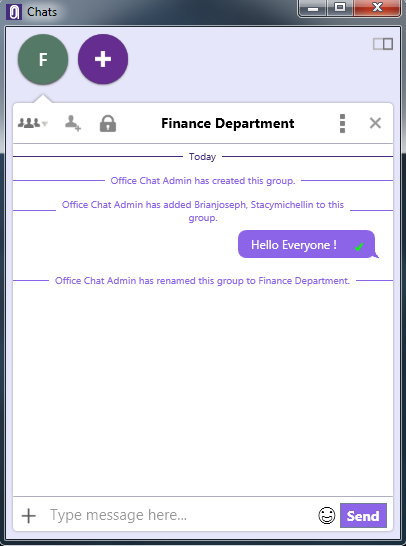
By default, the group name will show up with the participants name. Any group member can rename it from Chat Action menu.
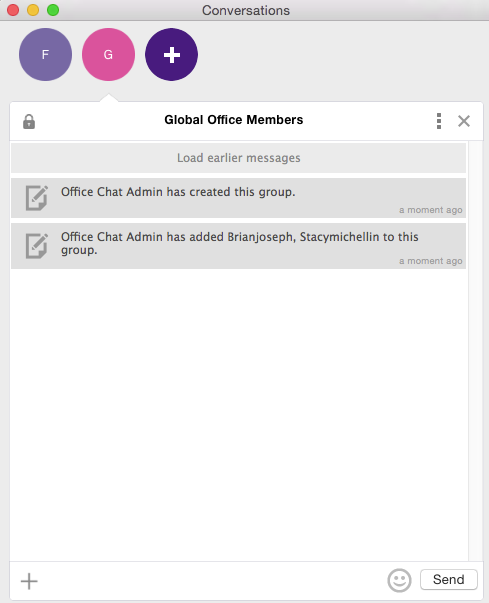
Office Chat on Mac
The same compose icon can be used to start both 1-0-1 and Group Chat. Simply insert multiple co-workers’ names/email IDs in the recipient text area and send a message to start a Group Chat.

A new chat window will open. Start typing names of your co-workers or email addresses on the top. Once done, set a group name and hit the “Create” button. The group will get created. It’s that simple!
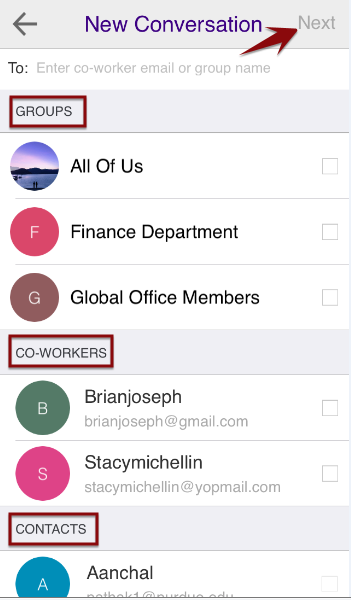
Office Chat on Android
Click on the pencil icon to start a chat
Select the Co-workers, groups and phone contacts with whom you wish you create the group. You can also type email addresses of the users you wish to include in the group.
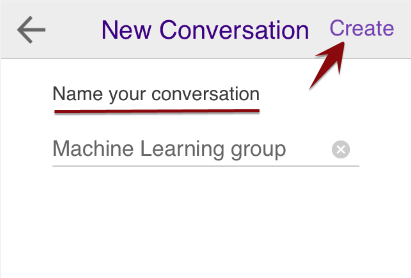
Once you select more than one recipient, the app will give you the option to name this group. Set the name and click “Start” button. Group will get created. It’s that simple!

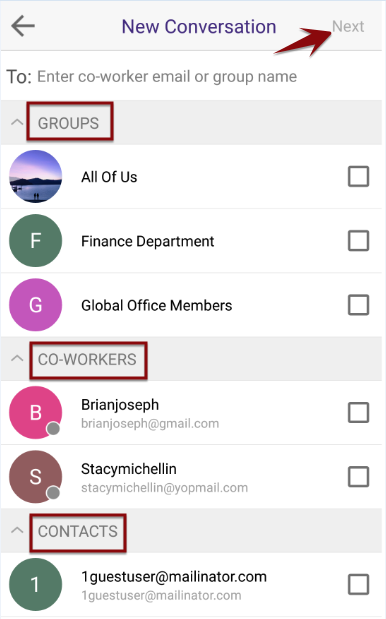
Office Chat on iOS
Click on the pencil icon to start a chat

Select the Co-workers, groups and phone contacts with whom you wish you create the group. You can also type email addresses of the users you wish to include in the group.
Once you select more than one recipient, the app will give you the option to name this as group. Set the name and click “Create” button. Group will get created. It’s that simple!
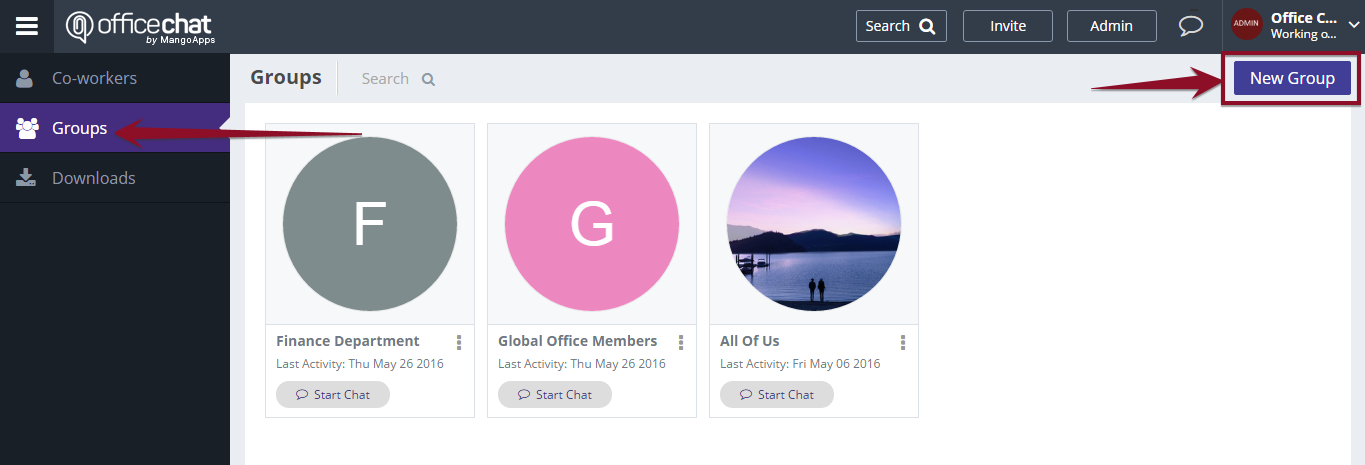
Office Chat on Web
Click on “Groups” tab on LHS. On the groups screen, click on “New Group button”
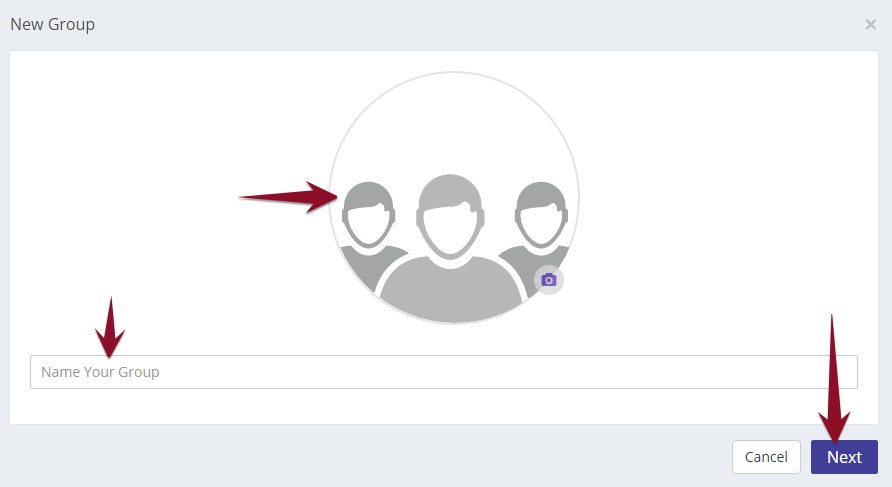
On the next screen, enter a name for the group (mandatory) and a group picture (optional). Click Next button.
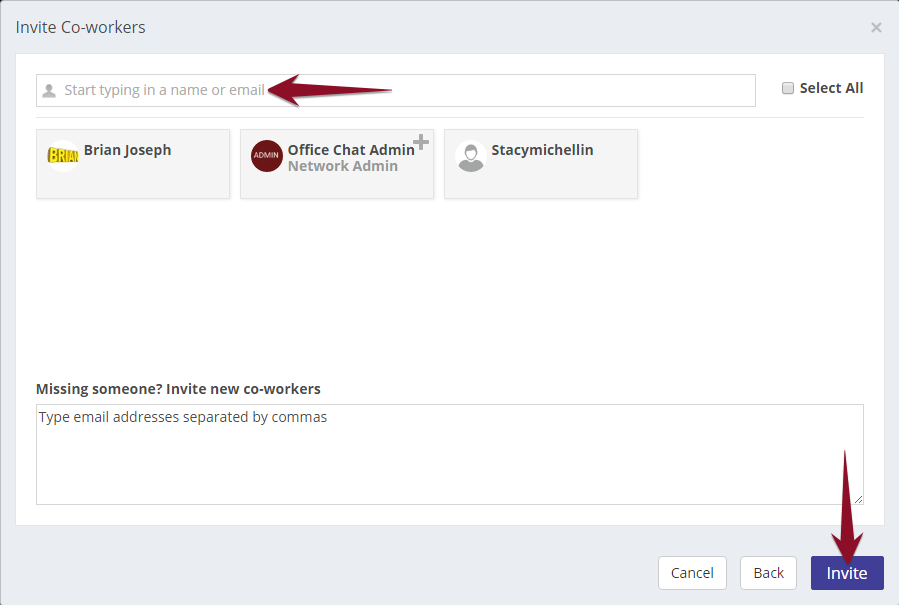
On the next screen, enter the email addresses of co-workers or select them from the list whom you wish to invite to the group. Click Invite button. The group will get created.
How to Manage Groups as the Office Chat Admin?
Please review this video.